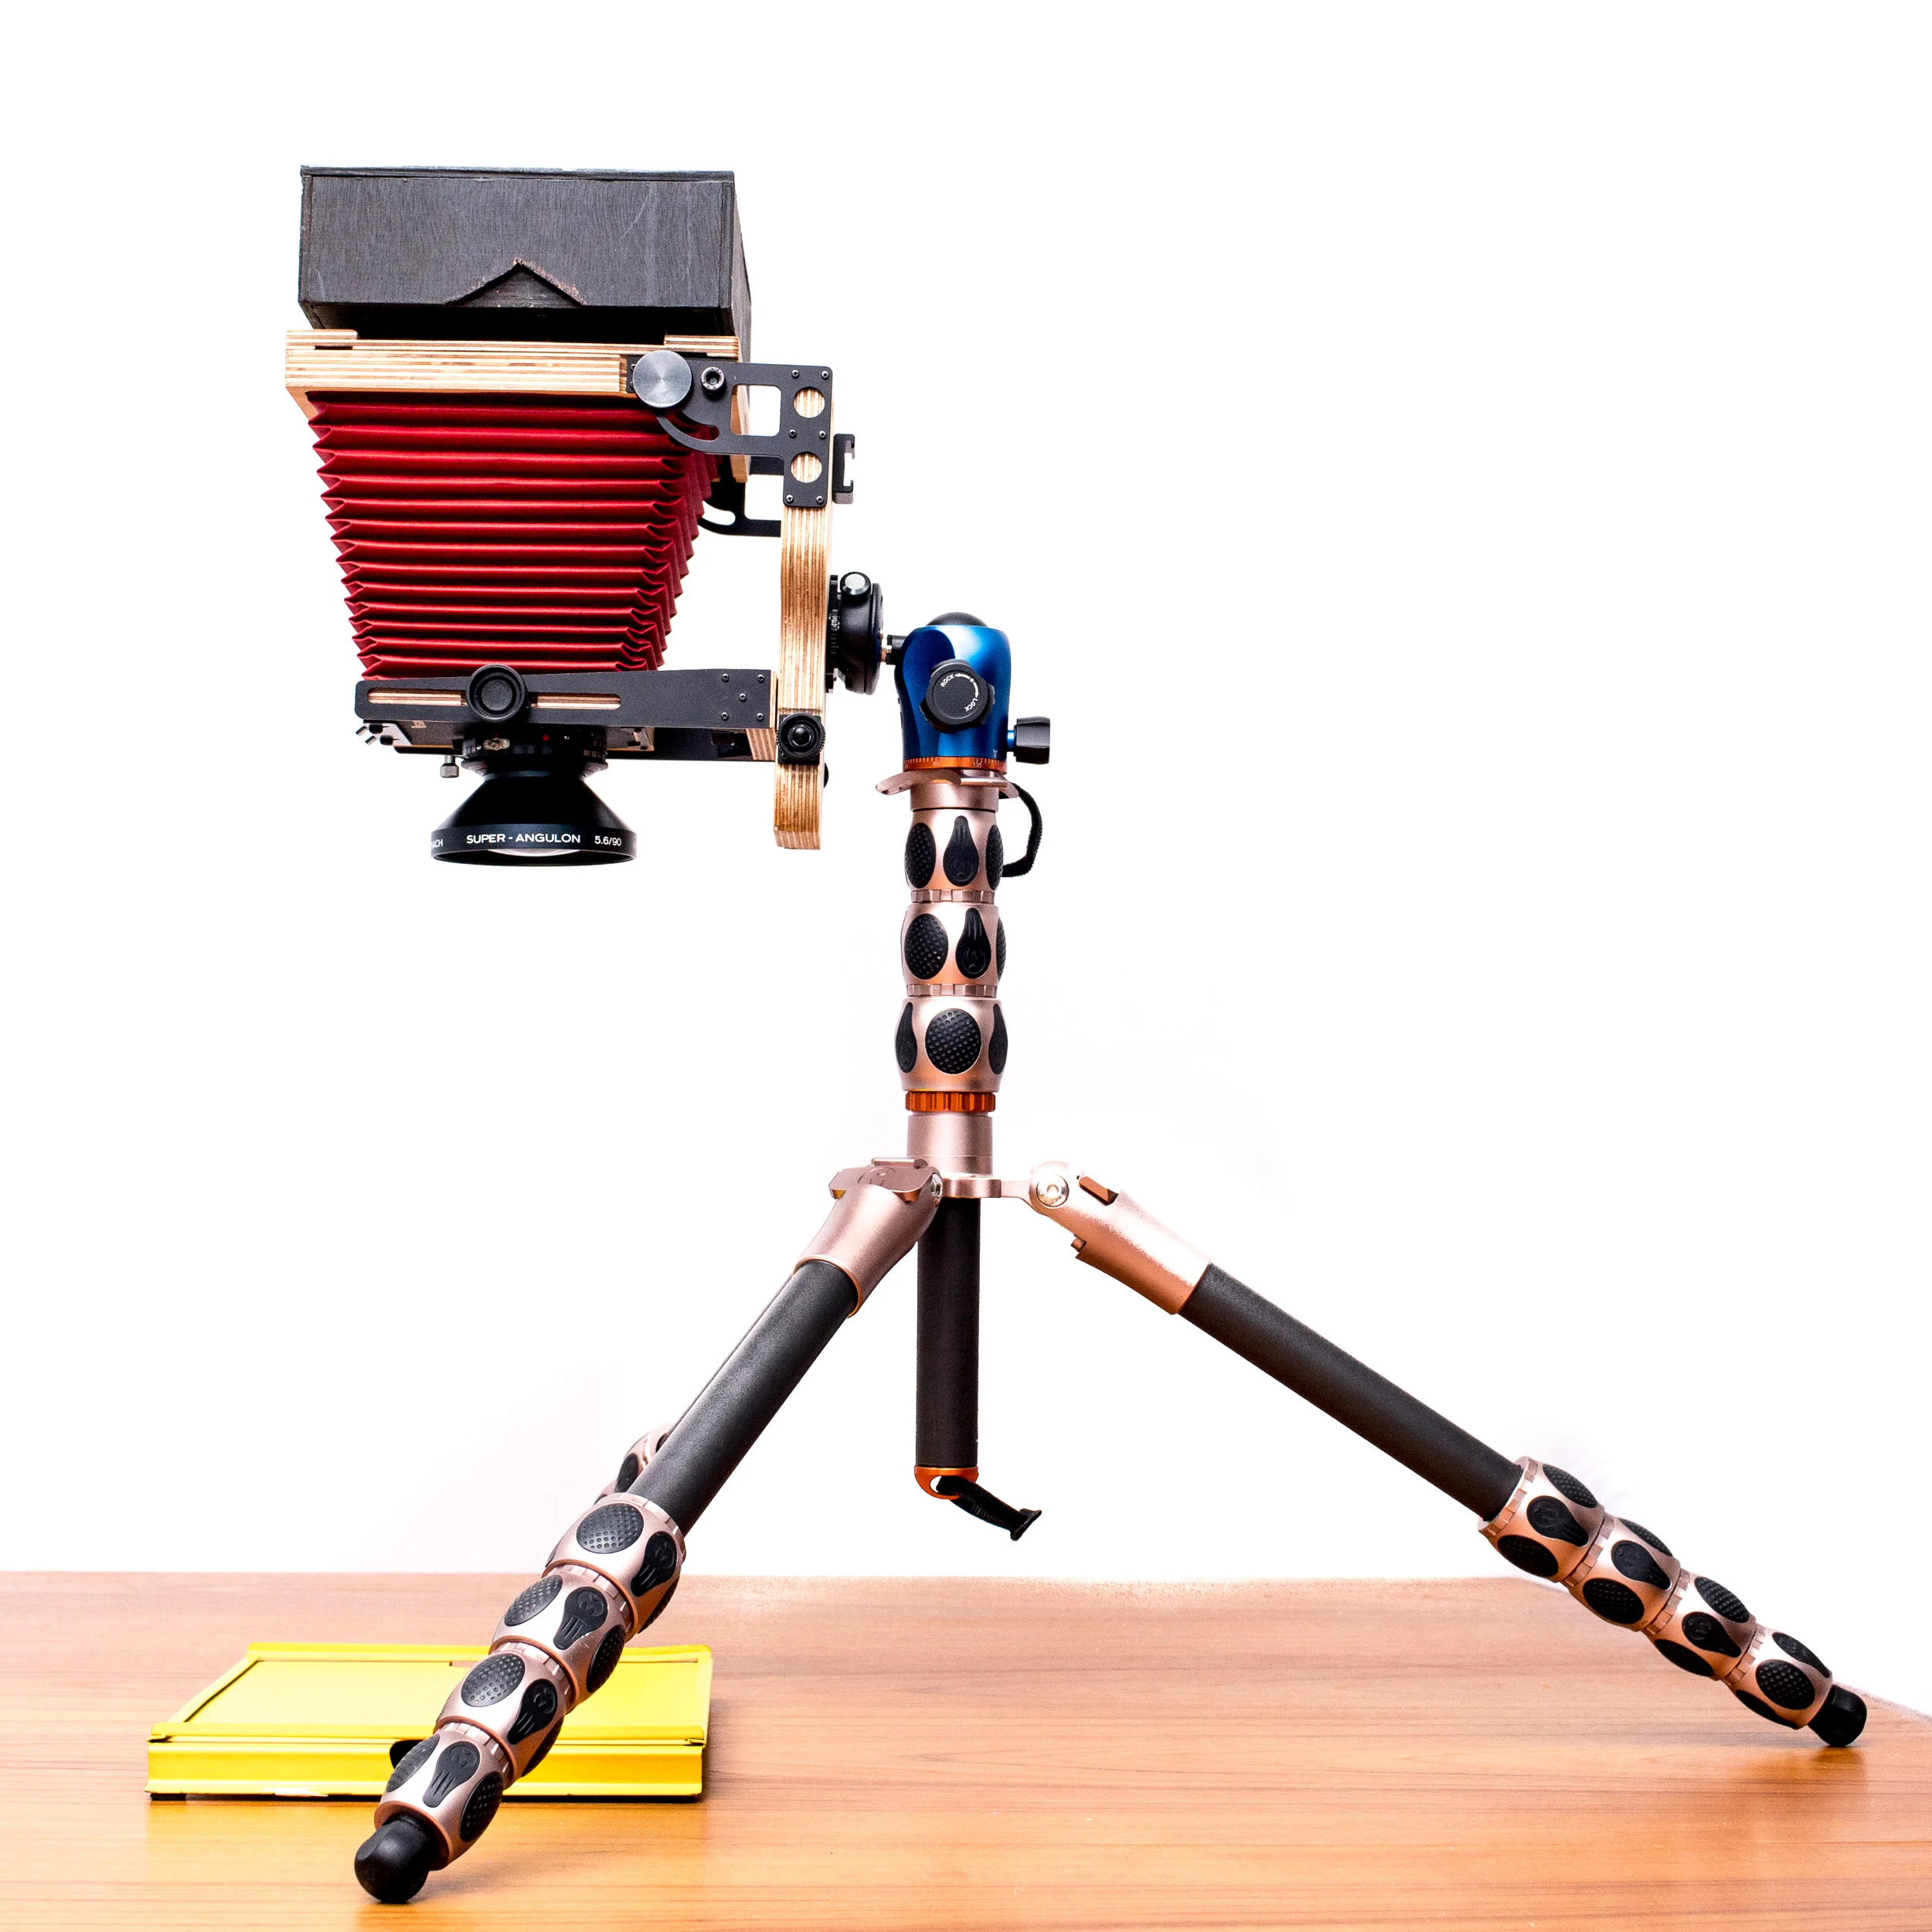
Minimalist darkroom: An enlarger using a 4x5 camera
When you buy through affiliate links on the blog post, we may earn a commission at no extra cost to you.
The creator of the Intrepid 4x5 camera announced he was working on an attachment to use the camera as an enlarger. What a brilliant idea.
I'll be the first to sign up when the enlarger is released - but in the mean time I wanted to see if I could make my own contraption and get printing right away. Here's how I did it...
The enlarging attachment
The idea is simple - use a LED light source (large, even illumination and low heat production) to shine through a negative in the film holder location on the camera. I designed an adapter out of layered thin plywood to hold a DIY foam negative holder on one side, with a multigrade filter and the LED source on the other. The entire thing is encased in a lid, using black silicone caulk to make it light-tight and painted it all black. This all sits on the back of a 4x5 camera and can be height-adjusted on a tripod (in this case, a 3 legged thing Albert). The Intrepid version looks like it will use the graflok system to securely attach the box to the camera. My version is loose, so there is a danger of it being knocked off.
Film formats
The foam negative holder is removable so it can be swapped out with another to mask different sized film. Different lenses are required for different film formats, too. They should be close the normal focal length associated with that format: I use a 65mm for 35mm film (the shortest focal length my camera can handle), a 90mm for medium format and a 150mm for 4x5 large format negatives.
Additional enlarging equipment
Rather than get an enlarger timer, I took Ansel's advice to use a simple metronome. I use a Seiko DM110 which has red indicator lights. The enlarger LED has a physical on-off switch so it can be left in the 'on' position and activated remotely with a simple foot switch.
The only other equipment needed are 4 trays for chemicals and water, tongs, paper easels and a safe-light (I use a junior bulb in a light-stand socket). The final critical item is a black-out screen for my bathroom window. I made it using layers of cardboard to act as a light-trap when inserted into the window frame.
All of this darkroom kit (bar the cardboard screen and the camera/tripod) can fit into a 32 quart storage container. Most of the chemicals used are part of my negative-developing kit. The only difference is the use of Ilford's multigrade developer for the prints.
This is a darkroom in a bucket. The world's most compact darkroom? It would be tough to beat this setup.
Using the minimalist darkroom
The first test of the darkroom was a success. I expected the LED was lower powered than a regular enlarger bulb, leading to very long exposure times, but in reality I was getting correctly exposed prints in the ballpark of 16 seconds at f22.
The main disadvantage was that the enlarger casing had to be removed to change the negative or the filter, whereas these items would be quickly switched out on a traditional enlarger. I also found that the honeycomb pattern of the LEDs was noticeable on the projection - this was addressed by placing a sheet of tracing paper behind the filter to act as a diffuser.
While not as convenient as a permanent darkroom, this compact setup might be what you are looking for if you have limited space.
Purchaces through these affiliate links provide commisions which help support this blog at no extra cost to you


